
Publish and share
Your form is private until you publish it. Publishing makes it live at a link anyone can open. You can then share that link, a QR code, or embed the form on your own website.
Publish your form
- Check that the header has no red errors chip.
- Click Publish. We save your draft first, then publish it.
- The status chip turns green and reads Live · v1.
If you have a payment step, set up payouts first. Without them, publishing is blocked.
Update a live form
Changes you make after publishing stay private until you publish again. Respondents keep seeing the last published version.
- Edit your form. The chip reads Unpublished changes.
- Click Publish changes.
Publish button and status chip
| Shown | Meaning |
|---|---|
| Publish and Not published | The form has never been published. |
| Publish changes and Unpublished changes | Your draft differs from the live version. |
| Published (greyed out) and Live · vN | Nothing new to publish. |
Version history
Each time you publish, we keep that version. We keep the last 20.
- Click the clock icon next to Publish. The Published versions list opens.
- Each row shows the version number, the date and a Live badge on the current one.
- Click Load on an older version.
- Confirm with Load version N, or click Keep editing.
Share your form
- Click Share link in the header. The panel is titled Share this form.
- Pick how to send it from the table below.
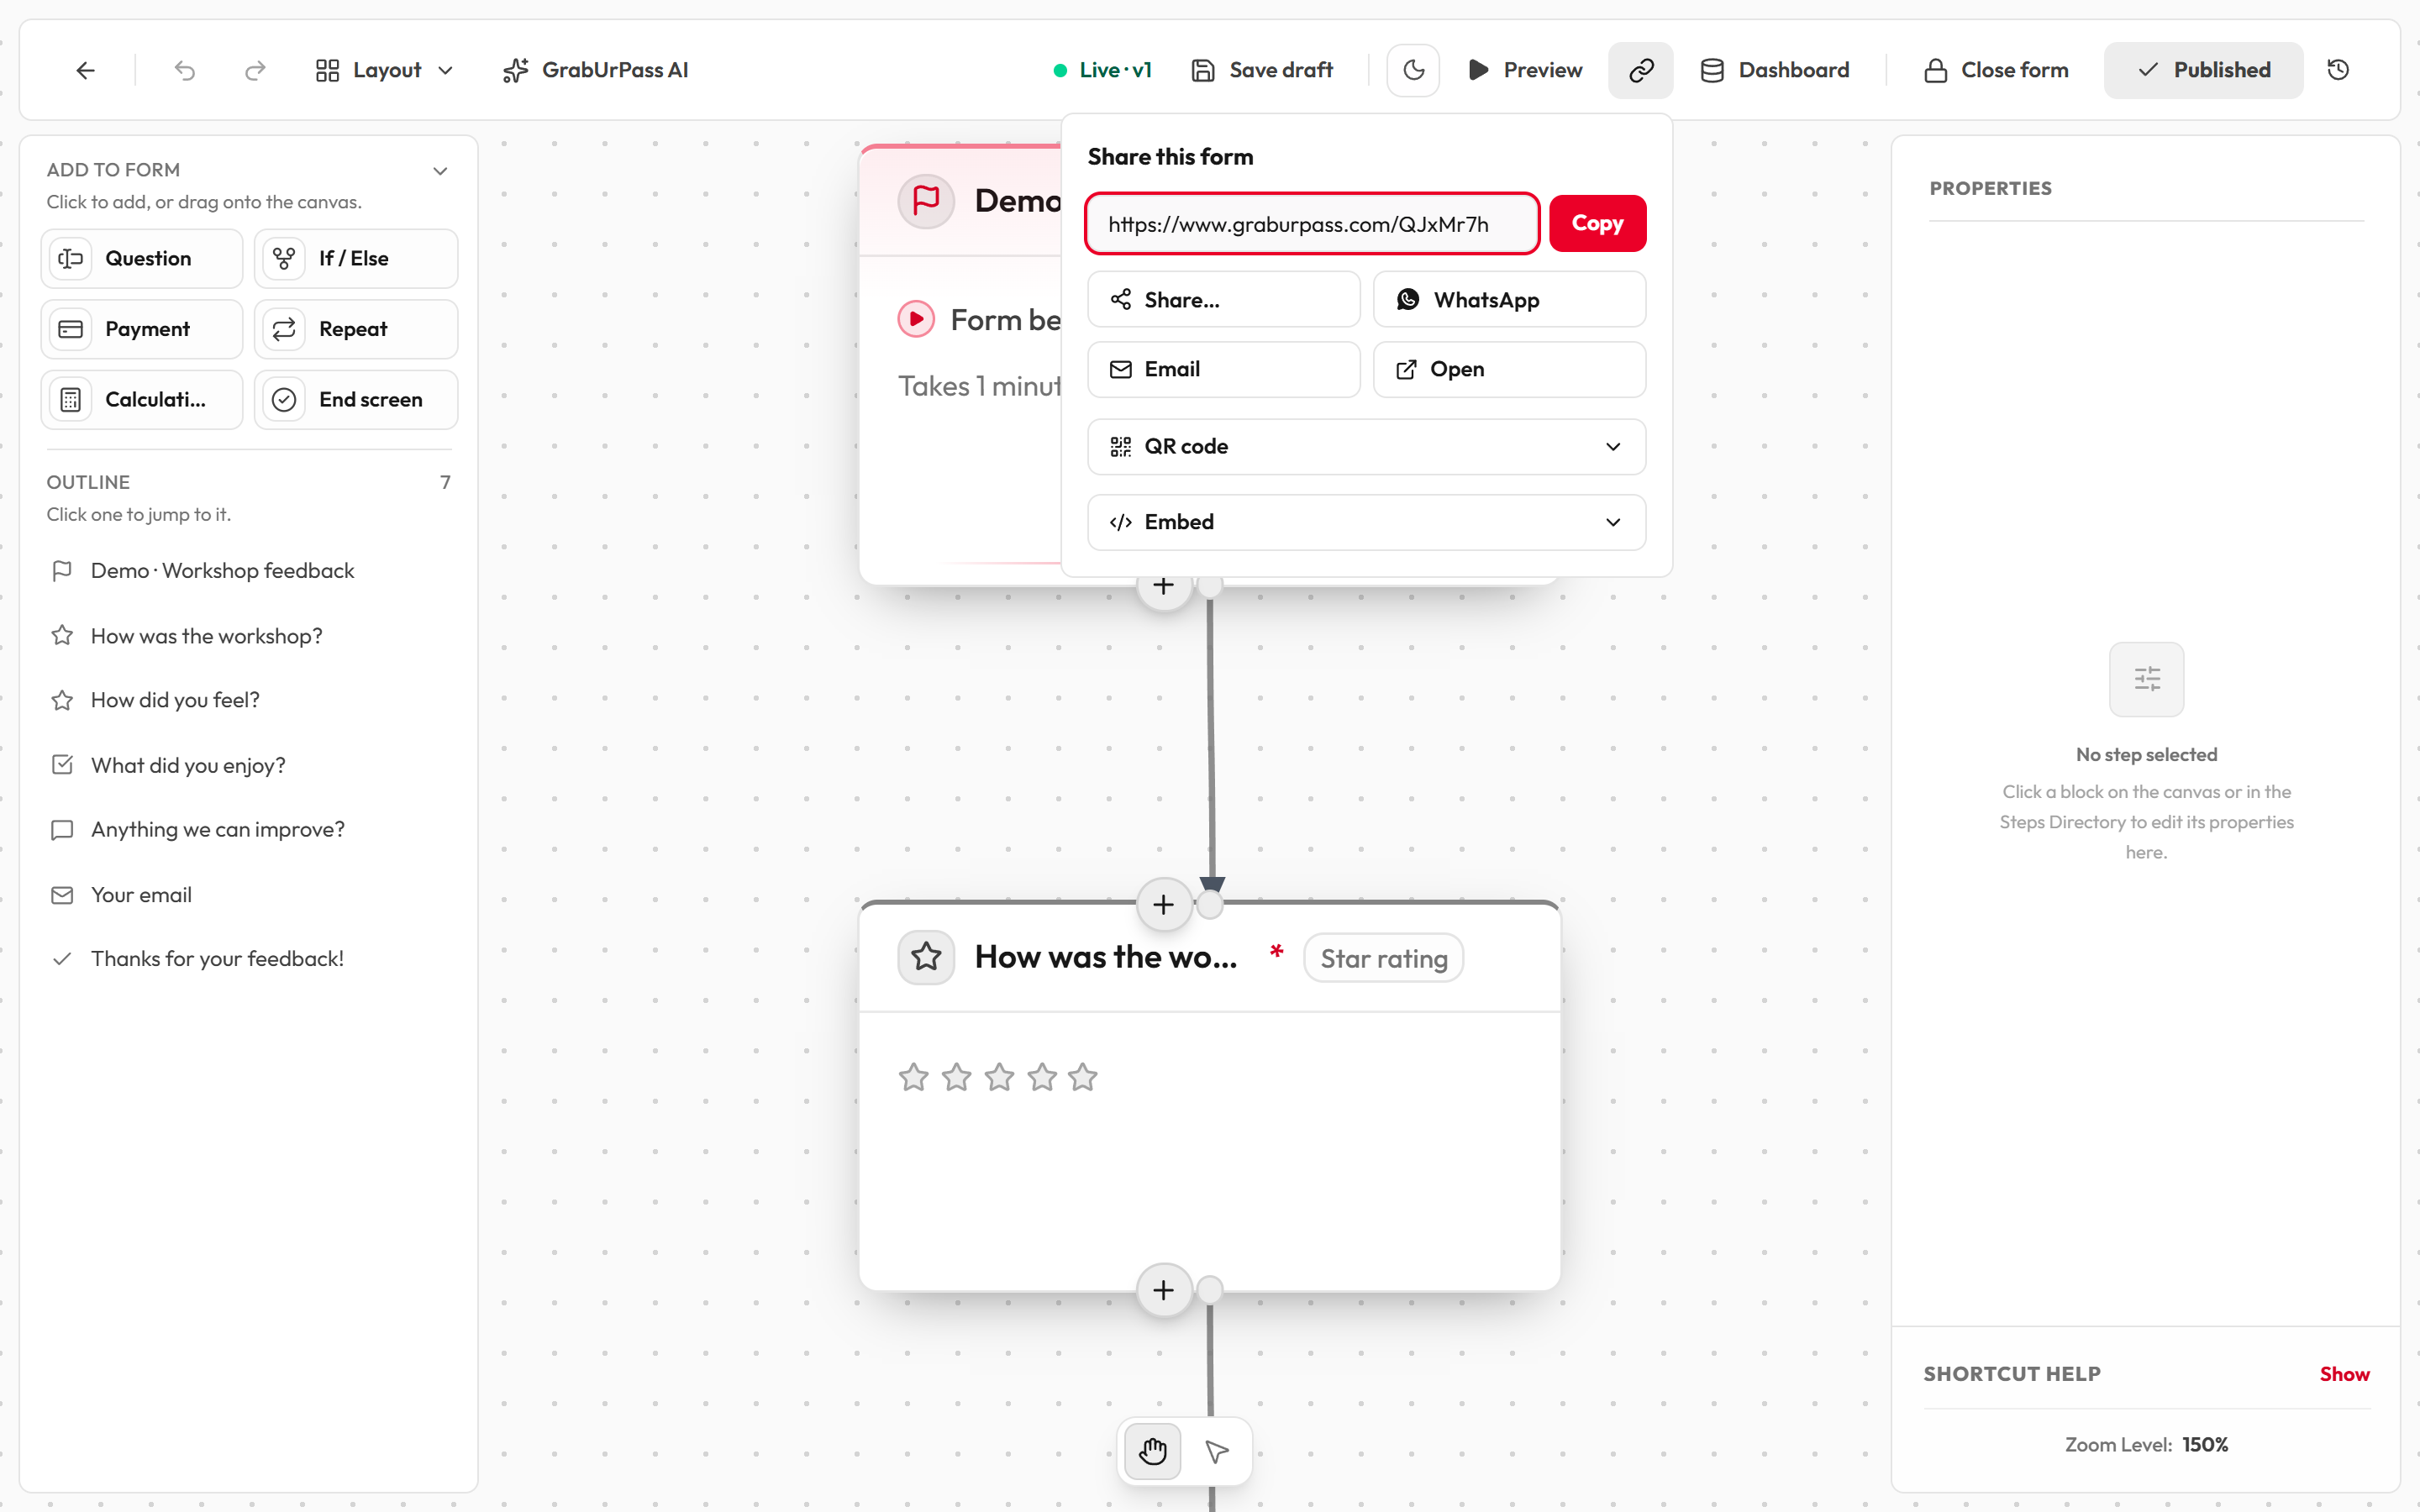
Before you publish, the panel says "Publish this form to get a shareable link." You can also open this panel from a form's ⋯ menu on the Forms page.
| Option | What it does |
|---|---|
| Link (copy) | Copies the form's link to paste anywhere. |
| Share… | Opens your device's share menu. |
| Opens WhatsApp with the link ready to send. | |
| Opens a new email with the link in it. | |
| Open | Opens the live form in a new tab. |
| QR code | A square code people scan with a phone camera. Click Download PNG to save it as an image you can print on posters or tickets. |
| Embed code | A snippet you paste into your own website so the form shows inside one of your pages. See below. |
Embed on your website
Embedding puts your form inside a page of your own site, so visitors do not have to leave it. Your website builder needs a place to paste HTML code, often called a "custom HTML" or "embed" block.
- In Share this form, copy the Embed code.
- Open the page you want to edit on your website.
- Add a custom HTML block and paste the code.
- Save the page and check it.
Link format
Every form gets its own short link: our site address followed by a 7-character code of letters and numbers. The code stays the same when you publish changes, so links you have already shared keep working.
Close and reopen a form
Closing stops new responses without deleting anything. Responses already collected are kept. It takes effect at once, and you do not need to publish.
- Open the form's dashboard from the Forms page.
- Click the ⋯ More actions menu and choose Close form.
- Confirm. The dialog asks Stop accepting responses? Click Close form, or Keep it open.
- To reopen, choose Reopen form from the same menu.
You can also use the Close form / Closed · Reopen button in the editor header. Nobody can submit once a form is closed, even people already filling it in.
What people see when a form isn't accepting responses
| Situation | Message |
|---|---|
| Not open yet (you set an Opens at time) | "This form hasn't opened yet. Opens at" the time in the visitor's own time zone. |
| Closed (by you, or past the Closes at time) | Your Closing message, or "This form is closed." |
| Full (response limit reached) | Your Message when full, then your closing message, then "This form is full." |
| Never published, or deleted | A "This page doesn't exist" page. |
Set the opening and closing times, the response limit and these messages on the Start block.